The bevel is a fundamental technique for turning. This involves several key steps. As you hold the shaft of your tool steady against the rest of the tool, move the tool to the point where its cutting edge touches that stock. As the tool advances, you slowly raise the handle until the cutting edge engages the stock, resulting in shavings. The bevel does not cut through the stock. Once the stock is cut, lift the handle until it engages again.
Wood turning can be considered a specialist branch of woodworking.
Wood turning is a popular hobby that people who are passionate about woodworking and love to work with their hands. This specialty branch of woodworking is rewarding for both novice and advanced woodworkers. Demonstrations should take between 6-10 minutes and 10 minutes. During the demonstration, you should leave most of the stock in place so that you can focus on designing your piece.
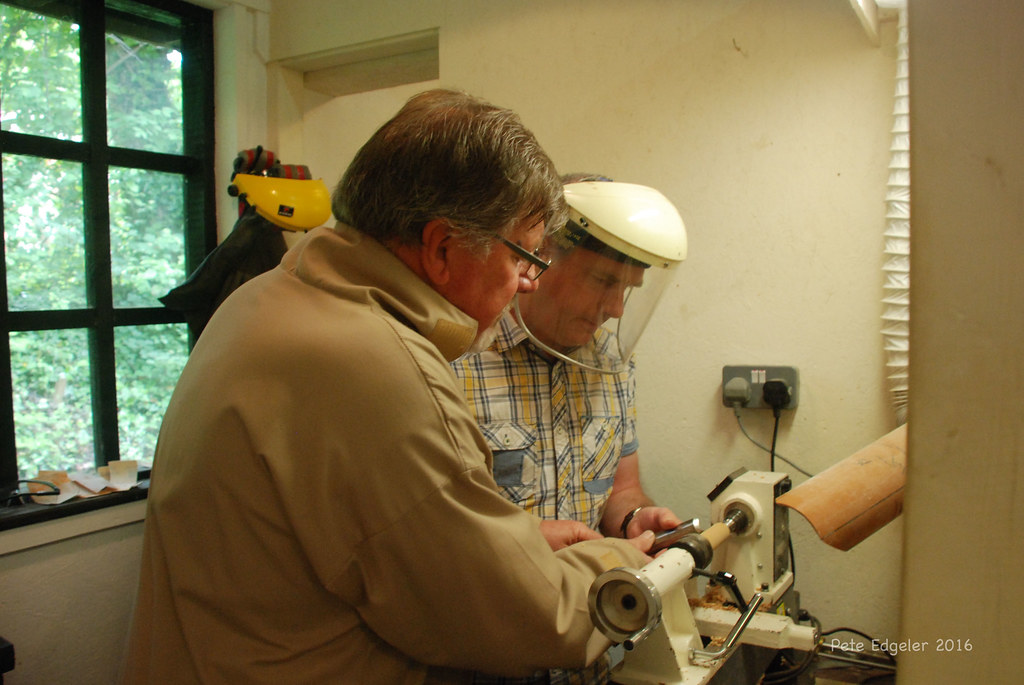
Woodturning is a dangerous activity that can cause eye damage. Woodturning involves using a sharp, metal tool to poke into the wood. Wearing goggles will protect your eyes. A face shield will stop the burl from hitting you nose and causing injuries. Moreover, the wood dust generated can cause respiratory problems, skin allergies, and even cancer. Lastly, the wood shavings generated by wood turning can irritate your skin.
It takes less wood
Woodturning can be done on almost any tree species, but some pieces are more difficult to turn. Woodturning stock may be made from any section of a single tree. However, some trees have better grains and figures than others. These tips will help you make your woodturning projects go more quickly. First, select stable material. It is important to choose lumber that isn't susceptible to warping or moving. A piece should have tight bark. Tight bark resists being checked and allows the woodworker or artisan to create an edge vessel.
A wooden blank can be used as a basic tool for turning. Find a lumber yard, and then purchase it. A big sawmill is able to cut large logs in smaller sections. Next, you can cut the sections with a bandsaw or table saw. To create blanks, DIYers could also cut the lumber. Many times, fleshly cut lumber will be dried prior to turning. This prevents cracks which is crucial for high-quality turning projects.
It is also more stable
A Swiss-style lathe is a great choice if you want a more stable cutting environment. Bar stock can cause vibrations which can impact tool wear and precision. Swiss-style lathes don't have belt drives so they produce less vibration. Likewise, the sliding headstock must move smoothly and with precision to avoid the effects of harmonic vibrations from high-speed rotation. Preloaded roller pad on the sliding mechanism ensures smooth movement. High-speed rotation creates harmonic vibrations, so the sliding mechanism is able to absorb these vibrations.
FAQ
What is the minimum amount I will need to start?
Because each project is unique there are no exact numbers. But if you want to get an idea of how much money you'll need, consider these factors:
-
Material costs
-
Tools and equipment
-
Time spent working on the project
-
The hourly rate
-
What is your expectation for profit?
-
Whether you plan to hire help
For those just beginning, it may be a good idea to start small with simple items like boxes and picture frames. As you gain experience, more difficult projects will become possible.
What time does it take for furniture to be finished?
It depends on what size piece of furniture you have. A smaller project like picture frames or boxes can be completed in a single day. Larger projects such as tables and desks can take several days to complete. It takes time to stain and seal the wood properly.
Do you have any advice on how to start a woodworking business.
It is hard work to start a woodworking company. It's worth it if you're passionate and willing to work hard. You will probably love the challenge of starting your own business.
When you are launching a new venture, it is important to be aware of the possibility that you will encounter unexpected difficulties. You might run out money, or you may have to borrow unexpectedly. Perhaps customers won't pay you as much as you had hoped. To survive, you'll need to be prepared for such situations.
One tip is to have a separate banking account for your company. You'll be able to track how much money comes in and out.
How much do hobbyists need to invest in starting a business?
You will need capital to purchase the tools and supplies you need to start your woodworking business. A good place to start would be by buying a small table saw, drill press, circular saw, jigsaw, and sanding machine. These items aren’t too expensive so you won’t have to break the bank.
What is the difference between plywood and particle board?
Plywood is a combination of layers of wood, which are then pressed together under high pressure. Plywood is available in a variety of thicknesses. It is often used to make cabinets or flooring. Particle board is made of sawdust and resin that has been compressed into large blocks. This board is commonly used in home improvement projects. Both boards can be cut easily and are both durable.
How often should I purchase new supplies?
Over time, you may need to replace your tools. If you are using hand tools, you will need to sharpen them frequently. For power tools, replacement parts will be required frequently. You can spread your purchases over a number of months to avoid spending too much.
Can this be a way to make money?
Yes! Many woodworkers do. According to the U.S. Bureau of Labor Statistics, the median annual woodworker wage was $34,000 in May 2012. That's higher than the national average of $31,000 per year.
Statistics
- The U.S. Bureau of Labor Statistics (BLS) estimates that the number of jobs for woodworkers will decline by 4% between 2019 and 2029. (indeed.com)
- Average lumber prices rose about 600 percent between April 2020 and May 2021. (familyhandyman.com)
- The best-paid 10 percent make $76,000, while the lowest-paid 10 percent make $34,000. (zippia.com)
- If your lumber isn't as dry as you would like when you purchase it (over 22% in Glen Huey's opinion…probably over 10-15% in my opinion), then it's a good idea to let it acclimate to your workshop for a couple of weeks. (woodandshop.com)
External Links
How To
How to stain wood
Stain wood is a process that involves applying chemicals to the surface of wood, which changes its color. This chemical reaction causes the wood to change from white to brownish red. Although oak is the most popular type of wood to stain, there are many other types that can be used.
You can apply wood stains in many different ways. Some methods involve mixing the stain with a solvent (such as turpentine) and then brushing or spraying the mixture onto the wood. Some methods involve a mixture of water and dye that is applied directly to the wood. It is possible to mix stain into varnishes and paints, making it part of the finishing coat.
Preparing the wood surface is the first step to staining it. Cleaning the wood thoroughly removes any dirt or grease that could interfere with applying the stain. Sanding smoothens scratches and rough spots. You must then decide on the type of stain that you wish to use. There are two main kinds of stains available: non-penetrating stains and penetrating. Penetrating and non-penetrating wood stains penetrate deeper than other types, making them perfect for dark colors like mahogany. Light colors such as maple work well with non-penetrating stain.
You will need to decide on the type of stain you want to use, and then prepare your tools. Paintbrushes are great for applying stain because they allow you to evenly spread the liquid across the surface. To remove any stains left behind after painting, you will need some rags. If you plan on mixing the stain yourself make sure that you have enough containers to hold the different components.
Once you have prepared your materials, start by cleaning the area where you plan to stain the wood. You can remove grime and dirt with warm water and soap. Wipe down all furniture pieces with a dampened cloth and clean water. Take care to remove all debris and dirt, especially if you are planning on staining darker wood.
Next, apply the stain. Next, apply the stain to the furniture by starting at one end. Slowly and carefully move along the grain of wood, slowly but steadily, until you reach the other end. Keep the stain from dripping off the wood's surface. Before proceeding to the next step, let the stain dry thoroughly.
A coat of clear polyurethane sealing agent is applied to protect the paint. Three coats are recommended for polyurethane. Allow the third coat to dry overnight, before sanding.