
A scroll-saw shadow box is a great way for artwork and photos to be displayed. A small shadow box can add a certain sense of wonder. You can make a simple scene with seven layers of 1/4 inch Baltic Birch plywood. It measures approximately four inches square by 1.75 inches thick. You can add small details to give the piece an extra dimension and intrigue. A shadow box that is larger would require more detail, and it would be more complicated. The scene in this example is one of the first items on the shadow box's inside.
Fox Classic fence
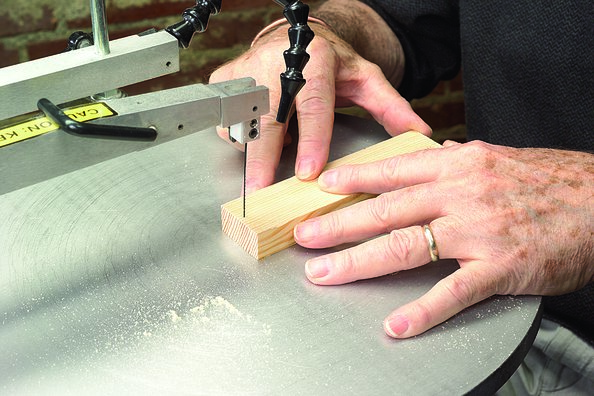
When you are building a scroll saw shadow box, one of the most important factors to consider is the type of fence you use. There are several options available, including the T-shape Shop Fox Classic fence, the original fence, and the accessory T-slot fence. Shop Fox Classic fences include a quick-release blade guard system and riving knife system. These fences are prewired for use on 120V 20A circuits. They also come with a 10-inch x 40T carbide-tipped knife.
Shop-Fox Classic fencing might be the right choice for you next project. This fence is made to last. The pattern options include the Five Layer Circle Art Scroll Saw Pattern (with a Duck Family Tray Scroll Saw Pattern), the Hanging OrganizerBox and the Four-Layer Jesus Cross. Each pattern comes with a video tutorial that will help you understand the steps.
Fox Aluma Classic fence
Shop Fox Aluma Classic fencing is a Tshaped accessory fence. It works with any shop-made Scroll Saw. The fence has the advantage of being easy to adjust, allowing you to cut even the largest panels with ease. The fence can be wired for an ordinary 120V 20A circuit. It also comes equipped with a 10-inch 40T carbide-tipped knife.
Shop Fox Original fence
Shop Fox Original fence for scrollsaws comes as an accessory. It features a T-shape blade guard, prewired knife guard, and riving system. It comes with a riving system and a 10 inch x 40T carbide tipped blade. If you're new to scroll sawing, you might want to start with a small project, such as a shadow box.
FAQ
Are you a genius in order to master woodworking?
No. Woodworking is not difficult. Anyone can learn how to use basic power tools and techniques to create beautiful works of art.
What type of wood should I choose?
The most popular types of wood used in woodworking include oak, pine, birch, maple, cherry, mahogany, teak, poplar, redwood, and bamboo. Every type of wood is different and can have a unique look and feel that will affect the final product. Oak, for example, tends be darker and more hard than other woods. Birch is lightweight and soft while mahogany is heavier and denser. You also have the option of solid wood or veneers. Veneers consist of thin sheets made from wood and glued together to form a single layer.
What kind tools do carpenters use to build?
A hammer is the most commonly used tool by carpenters. A hammer helps to carpenter pound nails into the wood. This helps to keep pieces together when they are working on a project. Other tools include clamps, pliers, screwdrivers, measuring tape, pencils, saws, drills, and wrenches.
How can I keep my shop organised?
The first step toward keeping your workshop clean and organized is to set aside a designated area for storing tools. You want your tools to stay clean and free from debris and dust. Pegboard hooks can be used to hang tools and accessories.
Are there any other things I should know regarding woodworking?
It is easy to underestimate the amount work involved with furniture construction. Finding the right wood for the project is the hardest part. It is difficult to choose between the various types of wood.
A problem is that wood doesn't have the same properties. Some woods will warp over time, others will split or crack. These things should be considered before you buy wood.
Statistics
- Overall employment of woodworkers is projected to grow 8 percent from 2020 to 2030, about as fast as the average for all occupations. (bls.gov)
- In 2014, there were just over 237,000 jobs for all woodworkers, with other wood product manufacturing employing 23 percent; wood kitchen cabinets and countertop manufacturing employing 21 percent. (theartcareerproject.com)
- The best-paid 10 percent make $76,000, while the lowest-paid 10 percent make $34,000. (zippia.com)
- The U.S. Bureau of Labor Statistics (BLS) estimates that the number of jobs for woodworkers will decline by 4% between 2019 and 2029. (indeed.com)
External Links
How To
How to stain wood
The process of staining wood involves the application of chemicals to the wood's surface, which causes it to change its color. This chemical reaction changes the wood's color from white to brownish. The most common type of wood used for staining is oak, although many other types of wood can be stained.
There are many methods to apply stain to wood surfaces. One method involves mixing the stain and a solvent and then spraying it on the wood. Some methods involve a mixture of water and dye that is applied directly to the wood. Stains can also be mixed into paints and varnishes, becoming part of the finish coating.
Preparing the wood surface is the first step to staining it. Cleaning the wood thoroughly removes any dirt or grease that could interfere with applying the stain. Sanding can smoothen out scratches and uneven spots. The next step is to determine the type of stain you would like to use. There are two basic kinds of stains: penetrating stains and non-penetrating stains. Penetrating stains penetrate deeper into the wood than non-penetrating ones, making them ideal for dark colors such as mahogany. Light colors such as maple work well with non-penetrating stain.
After deciding on the type of stain, you want to apply, prepare your tools. You can use a paintbrush to apply stains. This allows you spread the liquid evenly over the surface. After you're done painting, make sure to have some rags handy to remove any excess stain. If you are planning to mix your stain, ensure you have enough containers for each component.
Once you have prepared your materials, start by cleaning the area where you plan to stain the wood. Use warm water and soap to clean away dirt and dust. Use a dampened sponge and warm water to clean the entire piece. Take care to remove all debris and dirt, especially if you are planning on staining darker wood.
Next, spray the stain. Next, apply the stain to the furniture by starting at one end. Slowly and carefully move along the grain of wood, slowly but steadily, until you reach the other end. Make sure that the stain does not drip off the edge of the wood. Allow the stain to dry completely before you move on to the next step.
Apply a clear polyurethane sealant to protect the painted surface. Apply three coats of polyurethane sealer. Let the third coat dry overnight before you sand the final coat.