
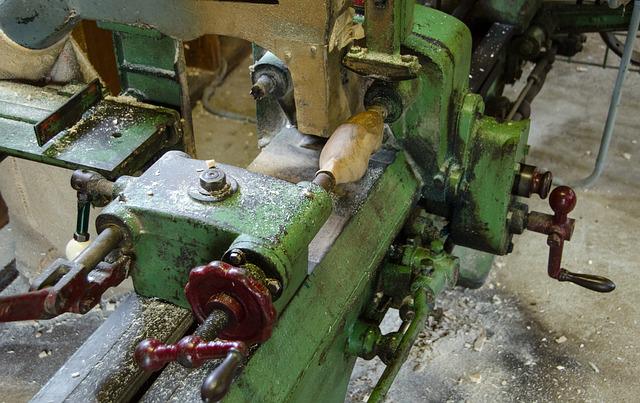
There are several tools that you need to add texture to furniture and scenes. The most widely used tool is the nail set. This is used to set nails. However, it can also be used to create small dimples on wood. The chisel was designed for small surface preparation. Chisels can be used to create uneven, slightly faceted surfaces. It doesn't matter which type of tool is used, unique textures are key to creating amazing surfaces.
Substance Designer
If you're looking to create node-based texturing tools, then you're in the right place. Substance Designer is an amazing texturing tool that makes creating bitmap textures, Substance files, and procedural effects simple. Substance designer includes GPU-accelerated Baking, a noise generator, as well as hundreds of updated editing tools. It is one of the most popular tools among 3d artists and game developers.
The software is easily integrated into existing work environments. Substance Designer has many features but is built to integrate with your existing workflow. There are no release notes for this application, but the latest version was released last year. Substance Designer is worth a look if you are new to 3D texturing. You can also try the free trial version to get an idea of how it works.
Material Baker 2
Material Baker 2's texturing tools allow you to create realistic and detailed textures for your game assets. You can also bake a texturing element into a single vertice or multiple vertices to replace the original color. The number and size of vertices as well as the size of the map image will influence the resolution and sampling quality for baked textures. Material Baker 2 is compatible all major game engines. For more information, see the Material Baker 2 help manual.
The Bake Section lists all materials that were assigned to selected mesh objects. You can then select a material and view its assigned objects. This tool requires knowledge in materials and shaders. This baked image will then be placed in the Material as a separate unconnected Texture node, directly underneath the principled BSDF shader. The baking workflow is unchanged. The new baker has the ability to fix textures that are too thin or too thick.
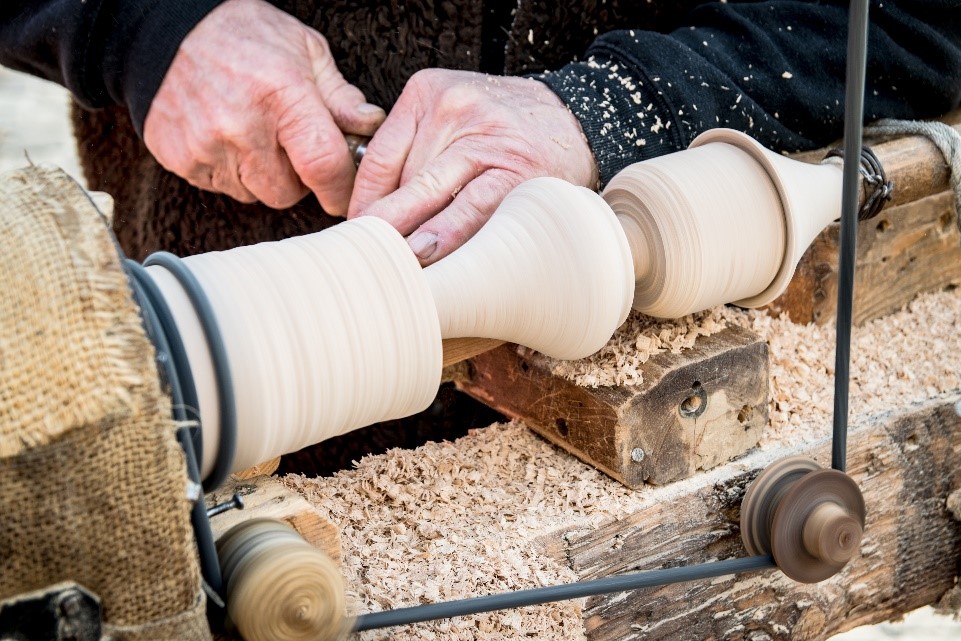
Robert Sorby Texturing Tool
The Robert Sorby Texturing Tool is a versatile tool for woodworkers. It creates a variety texture on both flat- and end-grain. These textures can vary in texture from soft and tactile to rough and dramatic. This versatile tool is easy to sharpen using the included diamond hone and comes with complete instructions. It's great for woodworking projects of all sizes and complexity. It is available in two different sizes, including the micro-sized version.
The 310H is equipped with an interchangeable cutter, handle and spindle. It allows you to alter the tactile and visual qualities of your work and add a unique touch to it. It's versatile and great for woodturning projects. You can use this tool on soft and hard woods alike, and it can give you countless hours of pleasure. It comes in a handle-mounted or free-standing version, and you can even upgrade it with spiralling cutters or tool rests.
Mari 3D paint tool
Mari 3D supports UDIM workflows, and a wide variety of textures and materials. The extensive Python API makes it easy for technical artists to automate workflows, and integrate it into their own pipelines. The comprehensive Materials System enables rapid creation of high-volume assets. Mari's ease-of-use and robust features also make it an excellent choice for new users. This article will discuss the advantages of Mari for 3D Painting.
The original Mari was created as a proprietary tool developed by Weta Digital, a visual effects company. This software was created specifically for the Avatar project. It can create high-resolution textures on complex models, and it will remain responsive to any scale. The software is designed to paint textures in context of animations and scenes, instead of individual objects. Its simplicity makes it ideal for all types of 3D painting projects from demo reels to movies.
Autodesk Mudbox
Mudbox textures can be used to improve the quality of your 3D models. Autodesk Mudbox texturing tools are simple to use and come with powerful options. You can import meshes created with scan and sculpt data. This software allows you to bake normal and displacement textures. You can also use the dynamic tessellation and ambient occlusion systems. Autodesk Flame allows you to link data with the program.
Mudbox is capable to handle many mesh models. Quad meshes are available for sub-divisions that will greatly simplify your workflow. The program also comes with UV coordinates, which are used to paint 3D objects and attach texture maps to them. To allow texturing, unwrap and trim vertexes when working with complex polygon models.
FAQ
How can you calculate the woodworking price?
When calculating the costs of any project, it is important to keep them as low and affordable as possible. It is important to ensure that you are getting the best materials prices. It is also important to consider the costs of other factors, such time, skill, and experience. You can find an estimate of the cost of different woodwork projects in our guide to common DIY tasks.
How much money do you need to get going?
Each project is unique so there aren’t exact numbers. Here are some factors to help you estimate how much money you will need.
-
Material cost
-
Tools and equipment
-
Time spent on the project
-
Hourly rate
-
What profit are you expecting to earn?
-
Hire help
It's a good idea for beginners to start with small projects like frames and boxes. As you gain experience, you'll be able to tackle more complex projects.
Are you looking for tips to start a woodworking company?
It's not easy to start your own woodworking business. However, if you are passionate about your hobby you will be willing to put in the effort. You'll likely enjoy the challenge of owning your business.
Remember that you may encounter unexpected problems when starting a new venture. Unexpectedly, money might run out. Perhaps customers won't pay you as much as you had hoped. These situations are necessary for survival.
It is a good idea to create a separate bank account just for your company. This will ensure that you always know how much money has come in.
What is the difference between a hobbyist or a professional woodworker, and how can you tell?
Hobbyists love making things from wood while professionals are more concerned with the quality of their work. Hobbyists tend to take pride and share their creations with family and friends. Professionals will spend hours researching designs before they begin working on a project. They'll pay great attention to details, from choosing the most suitable materials to finishing the work perfectly.
Statistics
- The U.S. Bureau of Labor Statistics (BLS) estimates that the number of jobs for woodworkers will decline by 4% between 2019 and 2029. (indeed.com)
- In 2014, there were just over 237,000 jobs for all woodworkers, with other wood product manufacturing employing 23 percent; wood kitchen cabinets and countertop manufacturing employing 21 percent. (theartcareerproject.com)
- If your lumber isn't as dry as you would like when you purchase it (over 22% in Glen Huey's opinion…probably over 10-15% in my opinion), then it's a good idea to let it acclimate to your workshop for a couple of weeks. (woodandshop.com)
- Woodworkers on the lower end of that spectrum, the bottom 10% to be exact, make roughly $24,000 a year, while the top 10% makes $108,000. (zippia.com)
External Links
How To
How to drive a nail through wood
The first step in driving a nail into wood is to choose the correct size and type of hammer. The most popular types of hammers include claw hammers as well as mallets and ball peenhammers. Each type has its strengths and weaknesses. For example, a claw hammer works best when you want to hit something hard, like nails; however, it's difficult to control precisely where the blow lands. The sledgehammer works well for large areas, but is too heavy for smaller tasks.
After choosing the right hammer, place your hand flat against the side of the head so that the handle rests comfortably in your palm. Hold the handle in your hand, but don’t force it too hard that you break. The hammer should be held straight up with your wrist relaxed. Swing the hammer back towards the ground, with your aim at the middle of the nail. You should feel the impact of the hammer striking the nail. If you're having trouble getting the hang of swinging a hammer, practice with a block of wood until you get the rhythm down.
The hammer should be held close to your body when you are ready to begin driving the nail. The nail should be perpendicular to wood's surface. Keep your eyes focused directly on the tip of the nail. Swing your hammer forward. Then follow through with the motions of the hammerhead. Keep doing this until you are comfortable with the swing. When you are confident with the technique, add power to your swings. Try holding the hammer above your shoulder and bring it down forcefully. You'll have more energy to work with.
Once you've made the first nail hole, take out the hammer. To remove the remainder of the nails, you can use a screwdriver/pry bar. Keep the nails heads in line with the surface of the board to prevent splitting the wood.