
There are many things you can do to make wood turning easier. The following tips will ensure that you stay safe while turning. To avoid common injuries when wood turning, you should follow these guidelines. You don't want your arm broken or any other serious injury to cause you to go to the emergency room. In addition, you should always wear the proper attire when turning. If you don't know how to protect yourself, you can read up on safety tips on wood turning online.
Safety
As with any other hobby, safety when wood turning is an important part of any project. Woodturning is generally safe but there are risks that must be considered. These risks can be minimized by using safety equipment and commonsense. Avoid jewelry and loose clothing while using rotating equipment. This article contains information about the most important safety measures for woodturners. Let's take a closer glance.
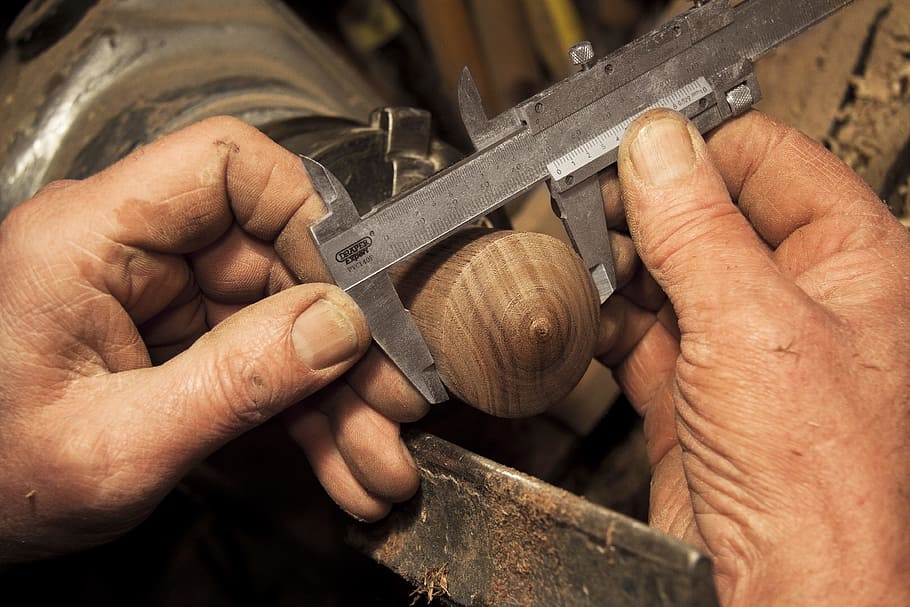
Another factor to consider when positioning your workpiece on a lathe is its position. Your workpiece should be at least 15 inches away from the toolrest before you start the lathe. You also need to keep in mind that the wood dust can make you slip if the toolrest is too close to the workpiece. A loosening may also be indicated by a loosening in the live center.
Tools
A wood turning lathe turns wooden objects. Two banjos drive the lathe. Each banjo has its own function and is critical to the operation of a lathe. This article will explain the different types of banjos and how they are used for turning wood. Let's also look at the use of tools for woodturning. This article will also discuss the importance safety equipment for woodturners. To ensure your safety while working, it is crucial to use safety equipment.
Steel-toed boots are recommended to protect your feet. Wear eye and/or ear protection when handling large objects. No matter what type of woodturning tool, protect your eyes from harmful fumes. For all shop activities, a good pair of steel-toe leather boots is recommended. When turning a blank, woodturning tools can also be useful.
Projects
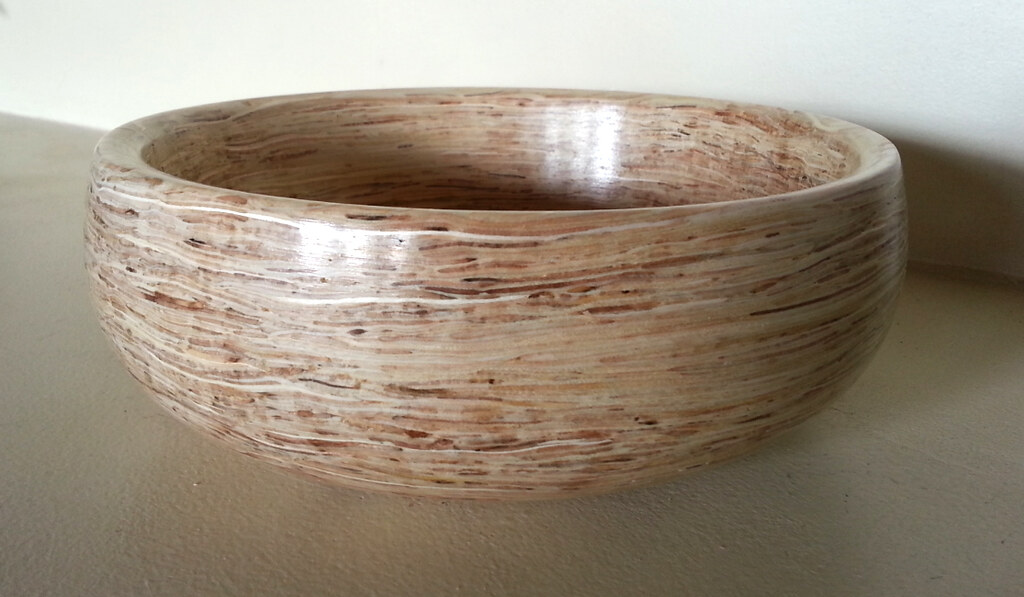
You might be wondering which wood turning projects are possible. You need to first understand what materials you can use. The Spruce explains that there are many kinds of hardwoods available. Local tree surgeons and sawmills can also provide wood. To get started, here are some projects for beginners. This project involves the creation of a bowl made from locally sourced, unseasoned timber. The end result will be amazing, even though it may take some time.
Woodturning requires patience, practice and skill regardless of your ability. Woodturning projects do not require much experience. However, it is possible to make changes to meet your individual needs. Woodturning is a great hobby that can help you relax and improve your mental clarity. Luckily, there are many resources available online to help you get started. Step-by-step tutorials are available online to help you get started.
Attire
Wood turning requires different attire depending on what type of project you're working on. Full-face visors offer greater protection against flying objects than safety goggles. Safety goggles with steel feet are best if you plan to use a grinder. Ear and eye protection are also recommended. Also, you should wear leather-steel-toe boots.
The proper attire for woodturning should consist of a comfy cotton shirt, a turned baseball hat, and high-top sneakers. It is best to avoid loose clothing when you are working on a piece. Avoid catching any jewelry on the spinning object. Tie your hair back and remove any jewelry. You will also need paper towels to remove wood shavings.
Dust masks
There are many types of dust masks available for wood turning. Many masks have filters or cartridges that reduce heat and moisture. These masks can also be purchased in pads that you place over your nose and mouth. Dust masks can have rubber or elastic straps that you place over your mouth and nose. These protect you from fumes, dust, and dirt. You can also use a powered mask in the case that you are physically unable to wear one.
Others wood turners use masks with high levels of filtration. The 3M 8210 particulate respirator is one example. It filters out 95% o particulate matter, and comes in 20 boxes. While dust masks for wood turning can cost a few dollars, these will protect your lungs and prevent respiratory issues. A 20-piece box contains the 3M8210.
Respirator
Wearing a respirator when you work on your lathe can help protect your face, lungs, and face from dangerous particles. For woodworking, a powered face mask respirator is an excellent option. Powered face masks are ideal for dusty and noisy operations. Woodturning can produce a lot of dust and shavings that can fly at you. Your standard safety glasses won't protect your eyes or face from flying debris. This debris can cause severe damage if it is accidentally dropped by the chuck.
FAQ
How long does it usually take to complete a piece furniture?
It depends on which wood you choose, how complicated your design is and what amount of finishing you apply. Hardwoods, for example, require more maintenance than softwoods. Hardwoods are more expensive than other woods. But they last longer, and resist moisture better. The typical time taken to finish a piece furniture takes anywhere from one to three month.
What tools are best to begin with when I become a woodworker
Woodworking is an art that takes patience and practice. It takes time to master all the tools and techniques involved in woodworking.
There are many different types of woodworking equipment available on the market today. Some people prefer using power tools while others prefer hand tools.
Your choice, however, is up to you. However, you need to ensure that the tool you use is the right one for the job. A basic set of hand tools may be enough for you if your skills are not yet developed.
Another option is to learn how to use a router, which is used for cutting intricate shapes into wood. These tools can be purchased at most hardware stores.
What time does it take for furniture to be finished?
It all depends upon the size of your piece of furniture. Smaller projects like boxes and picture frames can be finished within one day. Larger projects like dining tables and desks require several days. It takes time in order to properly stain or seal the wood.
Where can I purchase woodworking supplies
You can find everything you need in many places. You can visit your local hardware stores, or you can look online at sites like Amazon.com.
For furniture and other materials that you can reuse, check out flea markets and garage sales.
What is the hourly rate for a woodworker?
The hourly rate of a professional woodworker depends on many factors including experience, skill level, availability, location, etc.
An average hourly rate for skilled woodworkers ranges between $20-$50.
A less experienced woodworker may charge as little as $10 an hour.
How often do I need to buy new supplies
You will likely need to replace some tools over time. If you're using hand tools, you'll need to sharpen them regularly. And if you're using power tools, you'll need replacement parts periodically. Avoid buying too many products at once. Spread your purchases out over several months.
Where do you start when it comes to woodworking?
You can learn the most effective way to build furniture by actually building it. You'll need tools, and you'll have to make mistakes along the way, but if you keep at it, you'll eventually figure out what you're doing.
You should first choose the project you wish to complete. It could be something as simple as a box or as elaborate as a full-scale entertainment center. Once you've settled on a project find a local skilled woodworker. Ask them for their advice about the tools and where they can be found. Perhaps you could ask if there is someone else who does this type of work.
Statistics
- Most woodworkers agree that lumber moisture needs to be under 10% for building furniture. (woodandshop.com)
- The U.S. Bureau of Labor Statistics (BLS) estimates that the number of jobs for woodworkers will decline by 4% between 2019 and 2029. (indeed.com)
- Overall employment of woodworkers is projected to grow 8 percent from 2020 to 2030, about as fast as the average for all occupations. (bls.gov)
- Woodworkers on the lower end of that spectrum, the bottom 10% to be exact, make roughly $24,000 a year, while the top 10% makes $108,000. (zippia.com)
External Links
How To
How to stain wood
Staining wood can be described as a process where chemicals are applied to the wood surface. This causes the wood to take on a new color. This chemical reaction changes the wood's color from white to brownish. The most common type of wood used for staining is oak, although many other types of wood can be stained.
There are many options for applying stains to wood surfaces. Some methods involve mixing the stain with a solvent (such as turpentine) and then brushing or spraying the mixture onto the wood. Others use a solution made up of water and dye, which is then applied directly onto the wood. Stains can also be mixed into paints and varnishes, becoming part of the finish coating.
Preparing your wood for staining is the first thing to do. Clean the wood to get rid of any grease, dirt or other substances that might be detrimental to the stain's application. Sanding smoothens any scratches or rough spots. Next, you need to decide which stain you want. Penetrating stains are different from non-penetrating. Penetrating and non-penetrating wood stains penetrate deeper than other types, making them perfect for dark colors like mahogany. Non-penetrating oils work best when used with light colors, like maple.
After deciding on the type of stain, you want to apply, prepare your tools. The best tool for applying stains is a paintbrush. It allows you to evenly distribute the liquid over the surface. A few rags are also handy to clean up any spillages after you have finished painting. If you plan to mix the stain yourself, make sure you have enough containers available to hold the different components of the mixture.
Once you have prepared all your materials, it is time to clean the areas where you will stain the wood. Clean the area with soap and warm water to get rid of dirt and grime. Wipe down all furniture pieces with a dampened cloth and clean water. If you intend to stain darker wood, make sure you get rid of any debris.
The stain should be applied next. Apply the stain by brushing or spraying it onto one side of the furniture. Move slowly and carefully along the grain of your wood until you reach its opposite end. You must be careful not to allow the stain to drip off the wood's edges. Before proceeding to the next step, let the stain dry thoroughly.
Protect the painted surface with a coat polyurethane paint sealant. Apply three coats of polyurethane sealer. Allow the third coat to dry overnight before sanding the final coat.