This comprehensive book explains the basics of segmented turnings. It also contains examples by some of world's top turners. Keeling also addresses the evolving technology that is used in segmented wood turns, as well as safety and health concerns for wood workers. The book includes 10 projects, which progress in difficulty, as well as a gallery of inspirational segmented designs. The book is intended to help beginners learn about segmented turnings but it is not meant to be an exhaustive resource for those who want to make the most beautiful turniments.
Techniques
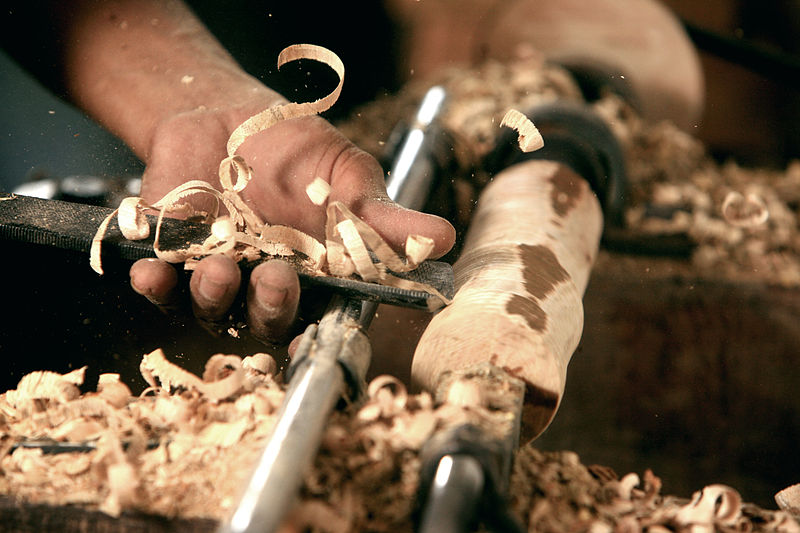
In Techniques for Segmented Wood Turnings, William Smith provides step-by-step instructions for making segmented turned objects. This woodworking technique is great for creating complex vessels that have intricate details. This technique is particularly well-suited for beginners. Basic knowledge in woodworking is required before you can start. Ideally, you should have some experience in the area of turning. After mastering the basics, you can move on to more advanced techniques.
Materials
Segmented wood turnings can be made in many ways. These can be made using stave or ring construction. Wood expands in an opposite direction to its grain so the turner needs to consider non-parallel grains directions and take precautions not to cause damage. This book will teach you the basics and introduce you to the many different styles and types of wood turning.
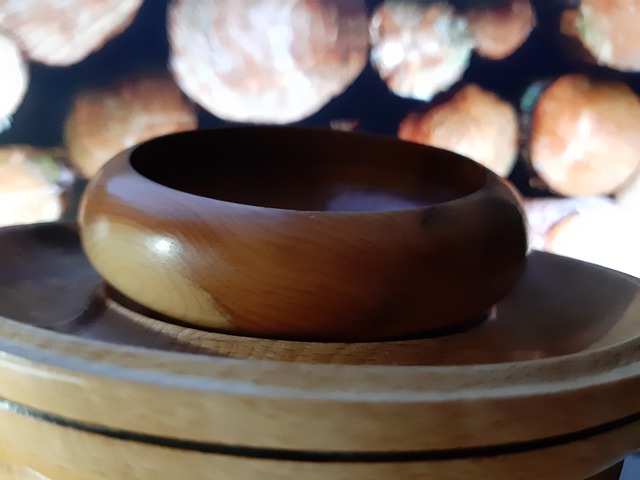
Feature Rings
Feature Rings are a special feature on many segmented bowls. The zigzag elements that turn on their sides create an almost lightning-like effect in the ring of the segmented box. The final turning is sanded at 600 grit. Finally, clear lacquer is applied to the surface. These ring shapes are an excellent choice for home decor or as gift items. Learn how to make segmented bowls in this 120-minute DVD.
Ring construction
There are several ways to construct rings for segmented wood turnings, including using a combination of stave construction and ring construction. You can also use the technique with solid, unsegmented wood. Wood expands in a direction that is perpendicular with its grain and moisture content. A non-parallel grain direction may affect the shape and appearance of the ring. The turner should consider this when designing the segmented turning.
Stave construction
There are two basic types of segmented wooden turning: ring, and stave. Stave construction is preferred for certain projects. The most common construction, however, is the ring. While both styles have their merits, ring construction is usually easier to achieve and may be more appealing to beginners. This article will describe the differences between stave or ring construction and how they can be applied to your next segmented design.
Solid wood
It is important to accurately measure miter angles when making solid wood sectioned turnings. Segments can vary in width depending on the size of the ring. PVA wood glue must be used to glue segments together with the end grain against each other. A pair of segments may be glued together simultaneously. Clamping rings with hose clamps can be used to hold them together. Each eight segment should have a miter angle at 22.5 degrees.
Floating base
Avoid using a flat or sloped base when creating segmented wood turns. A floating base will minimize stress and prevent the base from bursting. Floating bases can be made from a half-mortise joint where a solid disc fits in the gap, allowing the wood to move freely. Floating bases can be made from quarter-sawn lumber, which is more stable than plain-sawn. The base should not exceed 6 inches in diameter when creating a floating one.
FAQ
How can a beginning woodworker make a living?
Many people want to open an online furniture business and are learning how to build it. But if you're just getting started building furniture, there are other ways to earn money besides selling on Etsy. You could also sell at craft fairs, or other local events. For those who want to build their own furniture, you might offer workshops. If you have the experience to be a carpenter, builder, or a designer, you may consider offering your services in remodeling homes or creating custom pieces.
What material would your recommendation be to learn woodworking?
Start with softwoods, such as pine or poplar. When you feel confident with these two, move on towards hardwood.
Is it necessary to be a genius in woodworking to succeed?
No. No. Woodworking isn't rocket science. You can create beautiful pieces of art by learning how to use simple power tools.
How can I determine which tools are most suitable for me?
It helps to reflect on your needs and preferences before you shop for tools. Are you more comfortable with plastic or metal handles? What size of nails and screws do your hands use most? Do you prefer to use hand tools or power tools?
Do I have to refinish my furniture?
Yes! You don't have to hire a professional to refinish furniture. There are many ways you can do it yourself. Here are some suggestions:
Use sandpaper for removing stains and scratches. After that, use a clean towel to wipe the surface.
Use clear polyurethane varnish. Allow furniture to dry completely before you move it around.
Use acrylic paint to paint furniture.
Instead of painting, use stain. The furniture will get a rich look with the stain.
Shellac wax is applied. Applying wax will give the wood shine and protection.
How often should I purchase new supplies?
You will likely need to replace some tools over time. If you are using hand tools, you will need to sharpen them frequently. Power tools will require replacement parts every so often. To avoid buying too much at once, try to spread your purchases out over a few months.
Statistics
- The U.S. Bureau of Labor Statistics (BLS) estimates that the number of jobs for woodworkers will decline by 4% between 2019 and 2029. (indeed.com)
- Overall employment of woodworkers is projected to grow 8 percent from 2020 to 2030, about as fast as the average for all occupations. (bls.gov)
- The best-paid 10 percent make $76,000, while the lowest-paid 10 percent make $34,000. (zippia.com)
- Most woodworkers agree that lumber moisture needs to be under 10% for building furniture. (woodandshop.com)
External Links
How To
How to stain wood
The process of staining wood involves the application of chemicals to the wood's surface, which causes it to change its color. The wood will turn from white to brownish-red due to the chemical reaction. Oak is the most commonly used wood for staining, but other woods can also be stained.
There are many ways to stain wood surfaces. You can mix the stain with a solvent, such as turpentine, and spray it onto the wood. Another method involves applying a solution of water to the wood. The stain can be mixed with paints and varnishes to become part of the final coating.
Preparing your wood for staining is the first thing to do. You must clean the wood well to remove any grease or dirt that might interfere with the application of the stain. Sanding smoothens any scratches or rough spots. Next, you need to decide which stain you want. There are two types of stains that can be used: penetrating and non-penetrating. Penetrating and non-penetrating wood stains penetrate deeper than other types, making them perfect for dark colors like mahogany. Non-penetrating oils work best when used with light colors, like maple.
After you've decided what type of stain to apply, get ready for your tools. Paintbrushes are great for applying stain because they allow you to evenly spread the liquid across the surface. You should also have some handy rags to wipe up excess stains after you finish painting. If you plan to mix the stain yourself, make sure you have enough containers available to hold the different components of the mixture.
After you have prepared your materials, clean the area you intend to stain. You can remove grime and dirt with warm water and soap. Use a dampened rag and clean water to wipe the furniture. If you intend to stain darker wood, make sure you get rid of any debris.
Apply the stain. Begin at one end and spray or brush the stain on the wood. Slowly and carefully work your way along the grain to reach the opposite end. The stain should not drip off of the wood's edge. Before you proceed with the next steps, let the stain dry completely.
Clear polyurethane is used to protect the painted surfaces. Apply three coats polyurethane sealer. Let the third coat dry overnight before you sand the final coat.