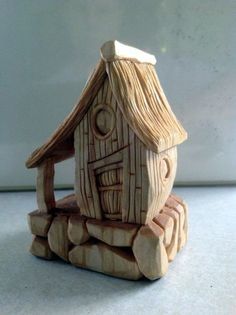
First, choose a piece and then make the required cuts to carve a face in wood. The expert will guide you through the process using a step-by, video tutorial. Carving the face will look more realistic if you use the progressing cut. To create a realistic face, the progression of the noses is key. To give your face a more realistic look, you can also use shellac and colored dyes.
Hardwoods
The type of wood used to carve a face in wood must be considered before you begin carving. Hardwoods can be described as a group of trees with large leaves that can thrive in many climate zones. They are suitable for many purposes including furniture and building because of their high density, strength and beautiful appearance. While softwoods are more affordable, hardwoods can be durable and fire-resistant.
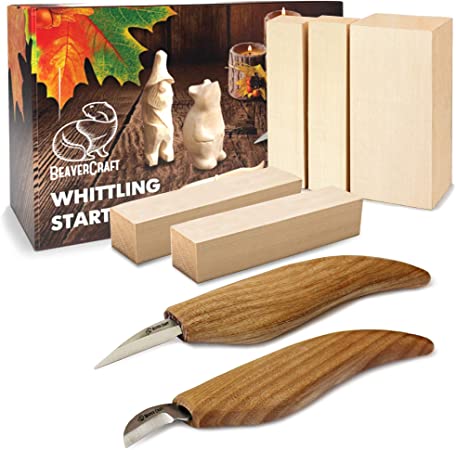
If you are new to wood carving you might consider softwood such as butternut and basswood. These woods are much easier to work with and are good for beginners. Be aware that softer woods won't have the same finish and quality as hardwoods. You should experiment with different types before you settle on a single type.
Softwoods
When carving a face from wood, the first step is to choose the right softwood. Softwoods are harder to carve and can often be knotted. They are also more susceptible to breaking, particularly if you use large strokes. An experienced carver may cut small pieces of wooden, which can reduce the detail. This is not a big problem, but it is something to be aware.
Some hardwoods can be more difficult than others. Aspen, butternut, and basswood are among the easiest to work with. You should use knives that have a greater bevel. Softwoods are much easier to work than hardwoods. You can also carve them along or across the grain. The quality of your finished product will depend on the wood you choose for carving.
Colored dyes
Use colored dyes to create vibrant and detailed wood carvings. These can be found in a variety of colors. You can also mix them with water or alcohol for a unique look. Colored dyes can be mixed with shellac for lighter woods. Use denatured alcohol to clean your brushes after you have applied the dyes. You can also use paste wax. An excessive level of glossiness may cause distractions to your work. Use 0000 Steel Wool to remove any excessive glossiness.
You can easily apply wood dyes in many different types. Wood dyes are compatible with all topcoats and are easy to apply. These dyes can also be used to solve common finishing issues. Because they come in a wide array of primary colors, they're easy to mix and apply. They are also available in many shades that can be mixed to suit individual preferences. You can mix them to make unique colors.
Shellac
Shellac should be available before you apply it to your wood carvings. A jar of shellac is available, but the best way to apply it to your wood carving is with a brush. Two-pound cuts will suffice. It will slowly build up and reduce brush marks. Shellac is extremely thin and it is better to buy thicker cuts than thinner ones. Make a pad from small, golf-ball-sized pieces of cotton and lint-free cloth to ensure you get the correct amount. Now dip your brush in the Shellac.
Shellac can be used to highlight and add color to your grain. Shellac is available in a variety of colors so you can make custom mixes by mixing different shades. The lac can be used to darken the color. Shellac will not yellow or turn cloudy like other wood finishes. It will also last longer, so you can make more faces. And you can do this with any kind of wood carving project!
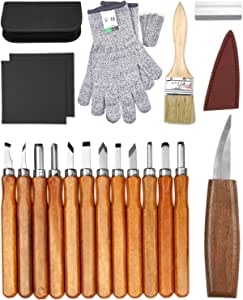
Gouges
You can find a wide variety of sizes and shapes in gouges. Straight and palm gouges are two of the most popular types. Straight gouges are meant to be held by the hand while palm gouges use shorter shafts and more manageable handles. Handheld carving is made easier by the shorter handles. Palm gouges are also called veiners and are ideal for carving faces in wood. Here are some tips before you start carving.
First, you should know how to choose the right gouge. You need a gouge that can carve a shallow groove. Use a sharp, narrow edged tool. Gouges can be categorized by their size. A 3/10 inch gouge will cut the same amount as a 5/10 inch gouge. As the first number increases, the scoop between the edges becomes deeper and the sweep gets progressively more curved. A gouge with a small stroke will create a shallow profile.
FAQ
Where can I get free woodworking plans?
For free woodworking blueprints, you don’t need to read any magazines or buy any books. Search Google for free woodworking plans. Search Google for "free woodworking" to see hundreds of sites that provide free plans.
What kind and type of wood should i use?
Woodworking is a popular job that involves oak, pine and maple. Each type of wood has unique characteristics that affect the look and feel of the final product. Oak, for instance, is darker and harder than most other woods. Birch is soft and lightweight, while mahogany is denser and heavier. You also have the option of solid wood or veneers. Veneers are thin sheets or wood that are glued together into one layer.
What is the average time it takes to finish furniture?
It depends on what size piece of furniture you have. For smaller projects such as picture frames and boxes, it can take less than a day to complete. Larger projects such as tables and desks can take several days to complete. It takes time to properly stain and seal wood.
Is it easy to start a woodworking business?
It is not easy to start a woodworking business. There are many requirements and regulations that must be followed. This doesn't necessarily mean that you should go through all the work of setting up a company. Many people prefer to join existing companies. This way, you only need to pay membership fees and taxes.
Is it possible to learn woodworking by yourself?
Doing is the best way to learn any subject. Woodworking is an art that takes patience, practice, skill and experience. Every craft takes practice and patience.
The best way to learn how to do something is actually to do it. So start small and build on what you have learned from there.
What type of tools does a carpenter use?
Carpenters use a hammer as their most common tool. A hammer helps to carpenter pound nails into the wood. It also helps them hold pieces together while they are working on a project. Other tools include clamps and pliers, screwdrivers as well as measuring tape, pencils and saws.
How do I determine what kind of wood my project is made from?
Always check the label before purchasing wood. The label should detail the wood species, its moisture content and whether it has been treated or not.
Statistics
- If your lumber isn't as dry as you would like when you purchase it (over 22% in Glen Huey's opinion…probably over 10-15% in my opinion), then it's a good idea to let it acclimate to your workshop for a couple of weeks. (woodandshop.com)
- Most woodworkers agree that lumber moisture needs to be under 10% for building furniture. (woodandshop.com)
- Woodworkers on the lower end of that spectrum, the bottom 10% to be exact, make roughly $24,000 a year, while the top 10% makes $108,000. (zippia.com)
- In 2014, there were just over 237,000 jobs for all woodworkers, with other wood product manufacturing employing 23 percent; wood kitchen cabinets and countertop manufacturing employing 21 percent. (theartcareerproject.com)
External Links
How To
How to stain wooden surfaces
Staining wood refers to applying chemicals to wood's surface. This chemical reaction causes the wood to change in color. The wood will turn from white to brownish-red due to the chemical reaction. Although oak is the most popular type of wood to stain, there are many other types that can be used.
There are many methods to apply stain to wood surfaces. You can mix the stain with a solvent, such as turpentine, and spray it onto the wood. You can also apply a solution containing water and dye directly to the wooden surface. You can mix stains into varnishes or paints to make them part of your finish coat.
Preparing your wood for staining is the first thing to do. To apply the stain, clean the wood completely. Sanding can smoothen out scratches and uneven spots. Then you must decide what kind of stain you want to use. There are two basic kinds of stains: penetrating stains and non-penetrating stains. Penetrating stains penetrate deeper than non-penetrating stains, which makes them great for dark colors like mahogany. Non-penetrating stains work best with light colors like maple.
After deciding on the type of stain, you want to apply, prepare your tools. Because you can spread the stain evenly with a paintbrush, it is ideal for applying them. It is a good idea to have rags on hand in case you need them to clean up any stains that may remain after you have finished painting. If you intend to mix the stain yourself you will need enough containers to hold all the components.
After you have prepared your materials for staining, clean the area. You can remove grime and dirt with warm water and soap. Use a dampened sponge and warm water to clean the entire piece. Be sure to get rid of all loose material, especially if staining is planned for darker wood.
The stain should be applied next. Begin at one end and spray or brush the stain on the wood. Move slowly and carefully along the grain of your wood until you reach its opposite end. The stain should not drip off of the wood's edge. Before moving on to the next steps, allow the stain drying completely.
A coat of clear polyurethane sealing agent is applied to protect the paint. Apply three coats polyurethane sealer. Allow the third coat to dry overnight, before sanding.